


Advertising seems to be blocked by your browser.
The ads help us provide this software and web site to you for free.
Please support our project by allowing our site to show ads.
Home /
Manufacturers /
OSBASE /
OSBASE PID_02DF Display /
USB/VID_17e9&PID_02DF /
0.1.0.3556 Jul 20, 2021
Download and install OSBASE OSBASE PID_02DF Display driver
OSBASE PID_02DF Display is a DirectDisplay device. The developer of this driver was OSBASE. In order to make sure you are downloading the exact right driver the hardware id is USB/VID_17e9&PID_02DF.
1. OSBASE OSBASE PID_02DF Display driver - how to install it manually
- You can download from the link below the driver installer file for the OSBASE OSBASE PID_02DF Display driver. The archive contains version 0.1.0.3556 dated 2021-07-20 of the driver.
- Run the driver installer file from a user account with administrative rights. If your User Access Control Service (UAC) is started please confirm the installation of the driver and run the setup with administrative rights.
- Follow the driver installation wizard, which will guide you; it should be quite easy to follow. The driver installation wizard will scan your computer and will install the right driver.
- When the operation finishes restart your PC in order to use the updated driver. It is as simple as that to install a Windows driver!
This driver was installed by many users and received an average rating of 3.1 stars out of 5909 votes.

2. How to use DriverMax to install OSBASE OSBASE PID_02DF Display driver
The advantage of using DriverMax is that it will setup the driver for you in just a few seconds and it will keep each driver up to date, not just this one. How can you install a driver with DriverMax? Let's see!
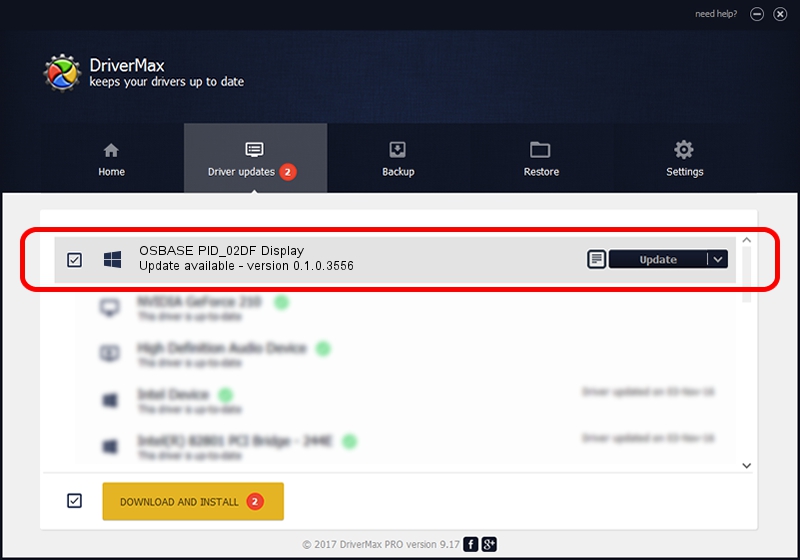
- Open DriverMax and push on the yellow button that says ~SCAN FOR DRIVER UPDATES NOW~. Wait for DriverMax to analyze each driver on your PC.
- Take a look at the list of detected driver updates. Search the list until you find the OSBASE OSBASE PID_02DF Display driver. Click the Update button.
- Finished installing the driver!

Aug 18 2024 1:28AM / Written by Andreea Kartman for DriverMax
follow @DeeaKartman